How to present a student software project
09 Aug '20
So you’re a student working on an individual project this semester (how exciting!) and your supervisor has asked you to submit the software as well as a report. So how are you going to present this great work? An email? A zipfile? A USB key?
You might be thinking: “I’ve done a lot of programming assignments, this should be the same right?” Well, maybe, maybe not. Unlike an assignment, your audience for a software project doesn’t know what your project is about, so you have to be clear about telling them! Your project might be for a teacher or examiner at first, but you might want to show it to your colleagues, potential employers, or even to wider open source or research communities. These people will want to know what your project is about, might also want to be able to reuse your code, or see how it works.
It’s really important that your project documents exactly how to run your code. Your audience, either an examiner, teacher, or anybody else, will not have time to try every python file to see which is the one that makes your project go, and they certainly won’t be able to magically know what the dependencies are for your code. To make these things obvious you need to write them in your readme file and provide a requirements.txt file (or similar) so that others can actually install and run your work!
For a software project to be excellent, presentation matters. If I don’t know how code works, then it might as well be broken. Here’s some tips for getting this right and submitting work that you (and your teachers) can be proud of!
This is part of a series of posts for my undergraduate and honours project students at the ANU, but it could be useful to other people, even you!
Git Repository as Artefact
Most student software projects should probably be presented as a git repository. This gives you a way to keep track of your work over the project, ways to experiment (with branches) and roll back if you make mistakes. Your supervisor and other collaborators or advisers can check in on your work during the project, and, when it’s finished, you could publish your project to a public hosting platform such as GitHub as part of your online portfolio.
Given that you are setting up a git repository, make sure you have a .gitignore file appropriate for your project, so that you don’t commit temporary or unnecessary files.
You should also practice good git hygiene. In particular, don’t commit huge binary files (e.g., PDF, zips, media files) in a git repo, and definitely don’t store passwords or API keys in a git repo.
If your project requires large data files, store them elsewhere (e.g., CloudStor for Australian research and educational institutions.), and write a script to download them before they are needed.
As a bonus, you can access public Github repos from Google Colab which is a neat way to show off a project to people without having them download it onto their system.
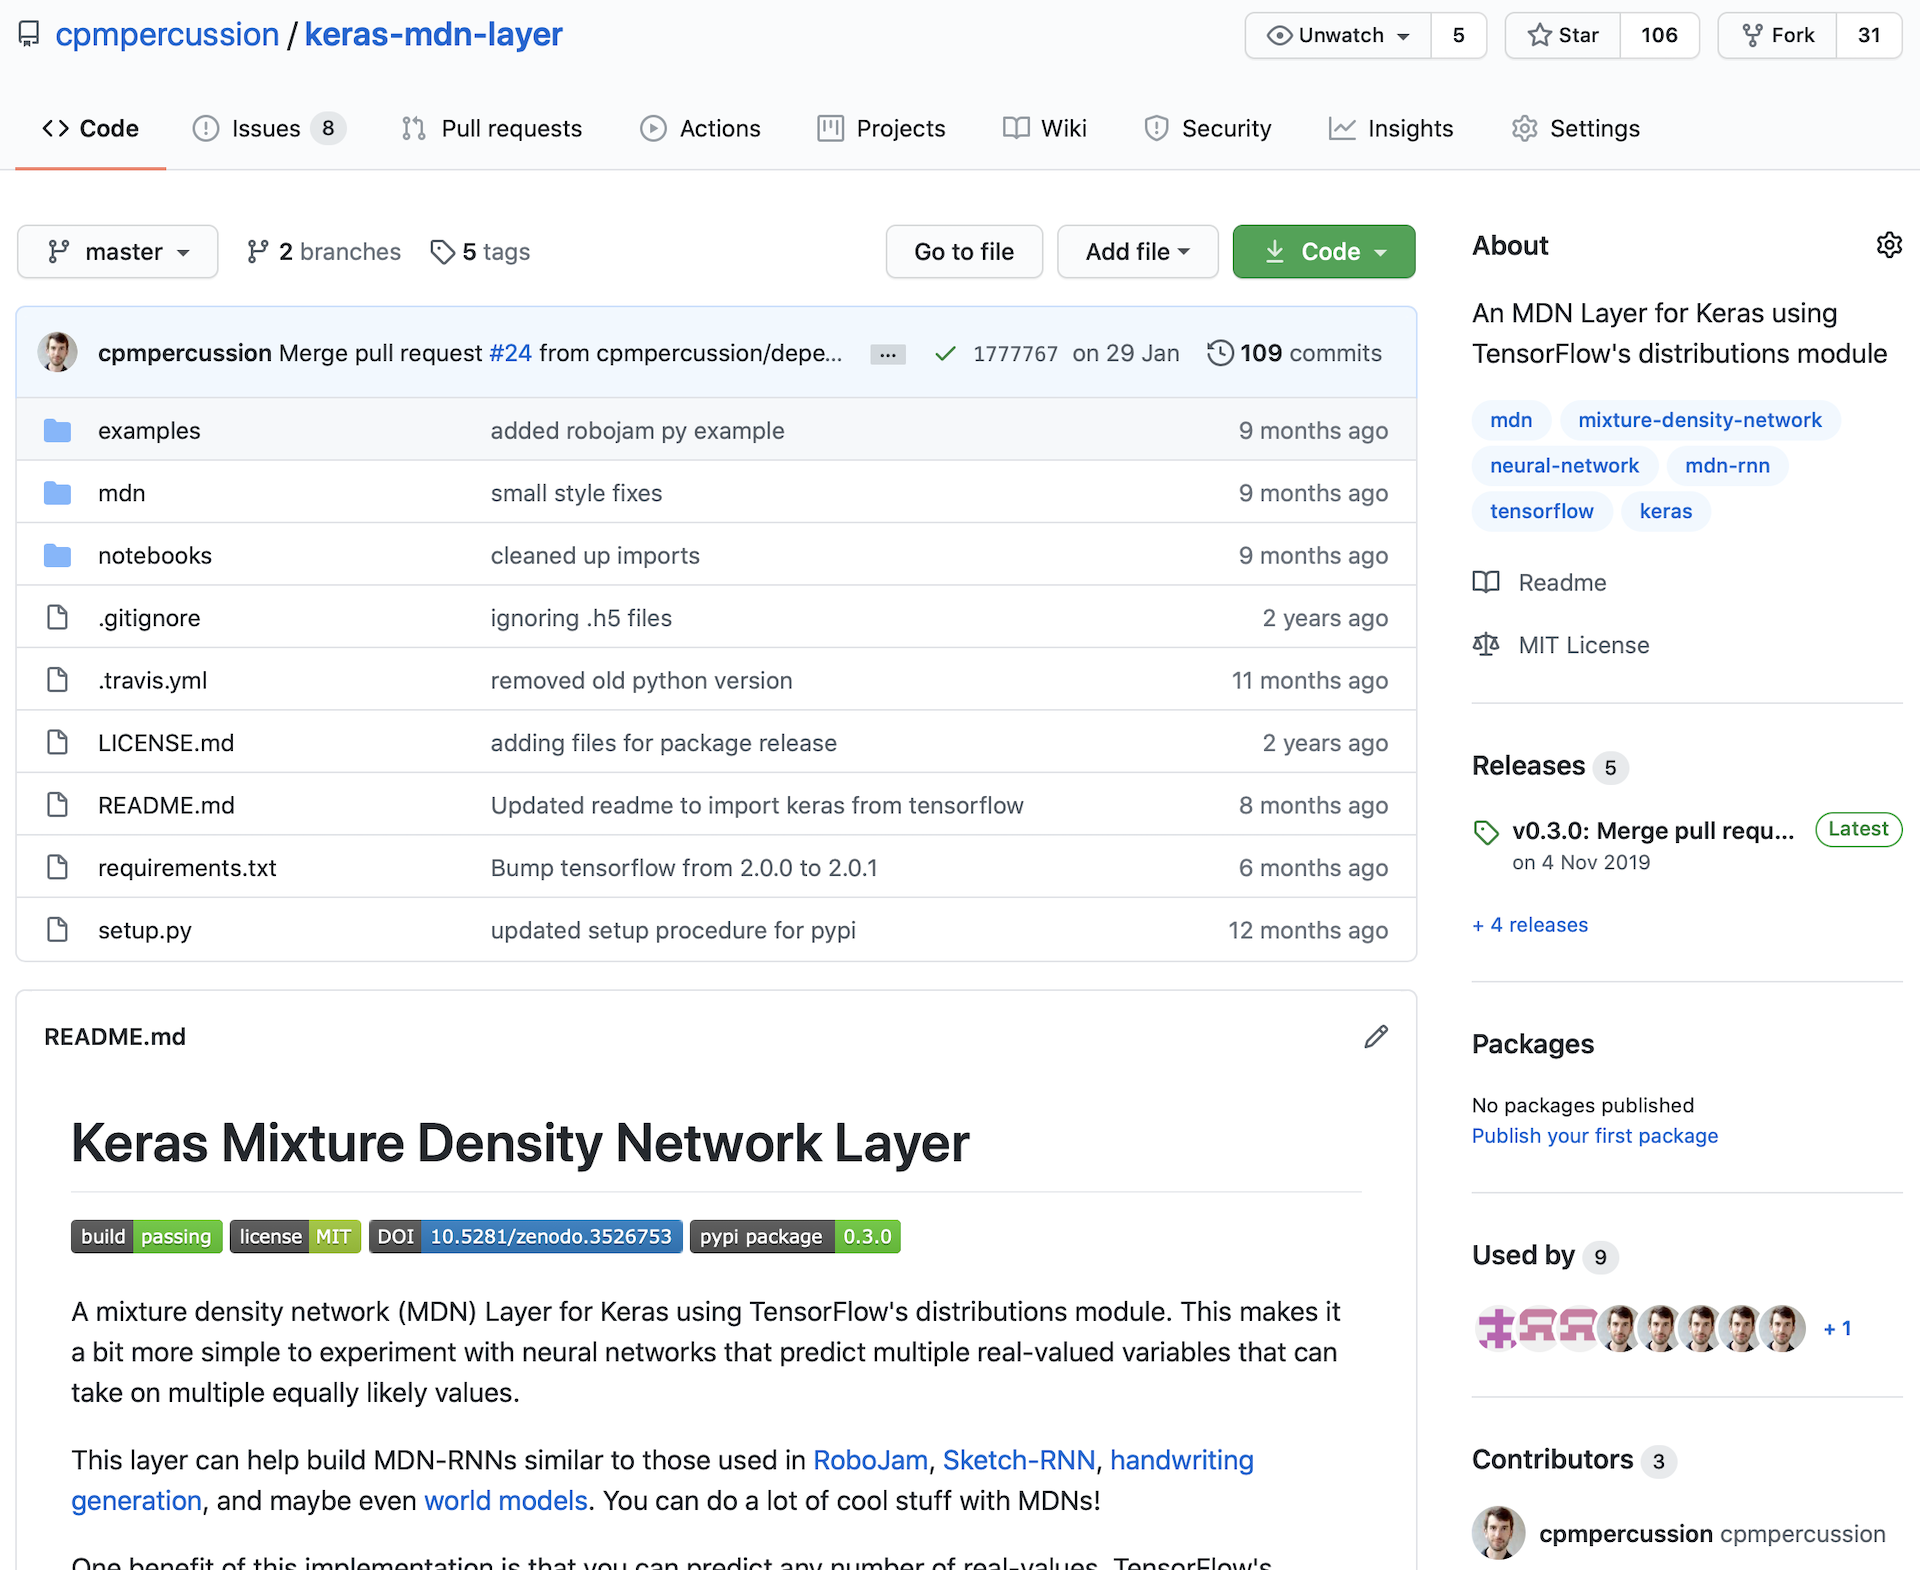
As a second bonus, a nicely set out git repo will look cool in GitLab or GitHub:
Project Structure
Most of my students do projects in Python or iPython Notebooks. Although there are many ways to structure a project, by following best-practices you know that your audience can quickly understand your project and might even try to test/use it!
If your project is in Python, it might be best to structure it as module. You might like to follow the “Structuring your Project” tutorial (Hitchhiker’s guide to python), or look at an example project on GitHub.
If your project was called project_name, it might look like this:
charles_martin_compxxxx_project_2020/
+-- README.md
+-- LICENSE
+-- setup.py
+-- requirements.txt
+-- project_name/
|   +-- __init__.py
|   +-- core.py
|   +-- utils.py
+-- tests/
|   +-- tests.py
+-- data/
|   +-- data.csv (perhaps include data if small)
|   +-- README.md (explains how to download data if large)
A few notes here:
- The git repository is not named
charles_martin_compxxxx_project_2020(notproject_name), so if you share it with a supervisor (who might have many compxxxx students), they can find your project. - Having a main
README.mdis pretty much mandatory (more below) - Having a license is good practice for any code you make public as it makes it clear who created the project and under what terms it can be used/reused (if at all).
- The
requirements.txtfile is a lightweight way to list a Python module’s requirements. You can and should work in a virtual environment so that you can keep track of what other modules are required to run your code. A more advanced way to do this would be with Poetry. -
setup.pymight allow others to install your module, or for you to distribute it. cool! - If you only need one code file for your project, you could simply name it
project_name.pyand place it in your repo. If you want multiple files as part of a module, you’ll need a directory calledproject_name, and (traditionally) a main file called__init__.py.
If your project is a collection of iPython Notebooks, you should use directories to make it obvious where the various parts of the project are (e.g., see this StackOverflow post):
charles_martin_compxxxx_project_2020/
+-- README.md
+-- LICENSE
+-- requirements.txt
+-- notebooks/
|   +-- experiment_1.ipynb
|   +-- experiment_2.ipynb
|   +-- prepare_data.ipynb
|   +-- utils.py
+-- data/
|   +-- data.csv (perhaps include data if small)
|   +-- README.md (explains how to download data if large)
The filenames here make it obvious why there are multiple notebook files, and we still have a readme, license, and requirements.txt files.
For an example have a look at my Keras MDN project
README.md
The readme is the most important file in your project. Really. If you don’t have a readme, nobody will know what your code is for, or how to install or use it.
You might like to follow a good readme template, and include some of the following sections:
- title
- project overview
- installing
- downloading data
- how to use
- running the tests
- references
A really nice readme might have some cool things like images or demo gifs (see this list of awesome READMEs for inspiration, but the above things are a good place to start.
LICENSE
A license sets out the terms under which others can use, modify or share your code. Do you want to allow others to reuse your code in their own projects? Do you want others to use your code, but only in similarly licensed projects? Do you want to reserve all rights unless they negotiate with you?
These are tricky questions. Many of my projects are licensed under the very permissive MIT License, but this is an individual choice you should make for your own work.
Luckily there’s a whole website to help you choose a license.
BTW, you can just not have a license, which basically means your code is available to view but you retain exclusive copyright over the work. If somebody else wants to use, modify, or share your code, they would need to ask for your permission to do so.
Status Badges
Oh you like my status badges? You want your repo to say  ?
?
These little badge images appear on lots of nice Git Repos and generally advertise how great and well-tested and published our repos are.
There are lots of them available (here’s some instructions on how to find different types).
If your project has tests, you might like to set up continuous integration so that anybody who visits knows it’s working without even trying it.
You can also get a badge for your license.
Badges don’t mean very much, but they’re fun and colourful. Just another way you can show attention to detail in your work.
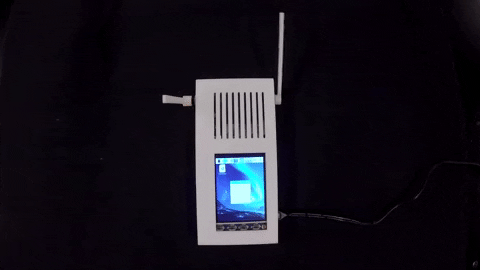
Videos, Sounds, GIFs, Images
If your project has sound, visuals or an interactive system as the output, then it’s probably a good idea to include some documentation of this media in your readme.
GitHub doesn’t allow HTML embeds when displaying readme files, but you might make a short (e.g., 10 sec) video into a gif and include that instead, e.g.:
For sound, you could link to soundfiles stored on Soundcloud or clyp.it, and for video you could link to a YouTube or Vimeo upload.